Except as otherwise noted, the content of this page is licensed under the Creative Commons Attribution 3.0 License, and code samples are licensed under the BSD License.
©2012 Google
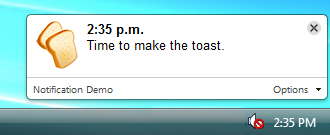
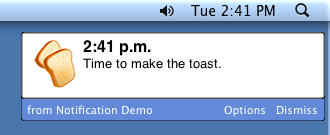
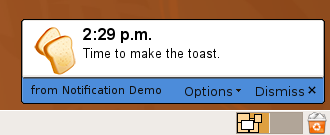
使用桌面通知来告诉用户发生了一些重要的事。通知出现在浏览器窗口的外面,如下面的截图所示,通知显示方式与位置的具体细节取决于具体平台。


您可利用一点点JavaScript代码以及可选的一个与您的扩展程序一起打包的HTML页面创建通知窗口。
首先在您的清单文件中声明"notifications"权限:
{
  "name": "我的扩展程序",
  "manifest_version": 2,
  ...
  "permissions": [
    "notifications"
  ],
  ...
  // 注意: 由于bug 134315, 您必须将您希望与createNotification()
  // 一起使用的所有图片声明为可以在网页中访问的资源。
  "web_accessible_resources": [
    "48.png"
  ],
}
然后,使用webkitNotifications对象创建通知:
// 注意: 没有必要调用 webkitNotifications.checkPermission().
// 声明notifications权限的扩展程序总是允许创建通知。

// 创建一个简单的文本通知:
var notification = webkitNotifications.createNotification(
  '48.png',  // 图标URL,可以是相对路径
  'Hello!',  // 通知标题
  'Lorem ipsum...'  // 通知正文文本
);

// 或者创建HTML通知:
var notification = webkitNotifications.createHTMLNotification(
  'notification.html'  //  HTML的URL,可以是相对路径
);

// 然后显示通知。
notification.show();
参见桌面通知规范草案(英文).
您可以使用 getBackgroundPage()和 getViews()来实现您扩展程序中的通知与其它视图间的通信。例如:
// 在一个通知中...
chrome.extension.getBackgroundPage().doThing();

// 来自后台页面...
chrome.extension.getViews({type:"notification"}).forEach(function(win) {
  win.doOtherThing();
});
您可以在 examples/api/notifications 目录中找到一个使用通知的简单例子。有关其它例子以及查看源代码的帮助,请参见 示例。
另外,您也可以参见html5rocks.com(英文)上的 通知教程。 。请忽略与权限有关的代码,如果您声明了"notifications"(通知)权限它们就没有必要了。